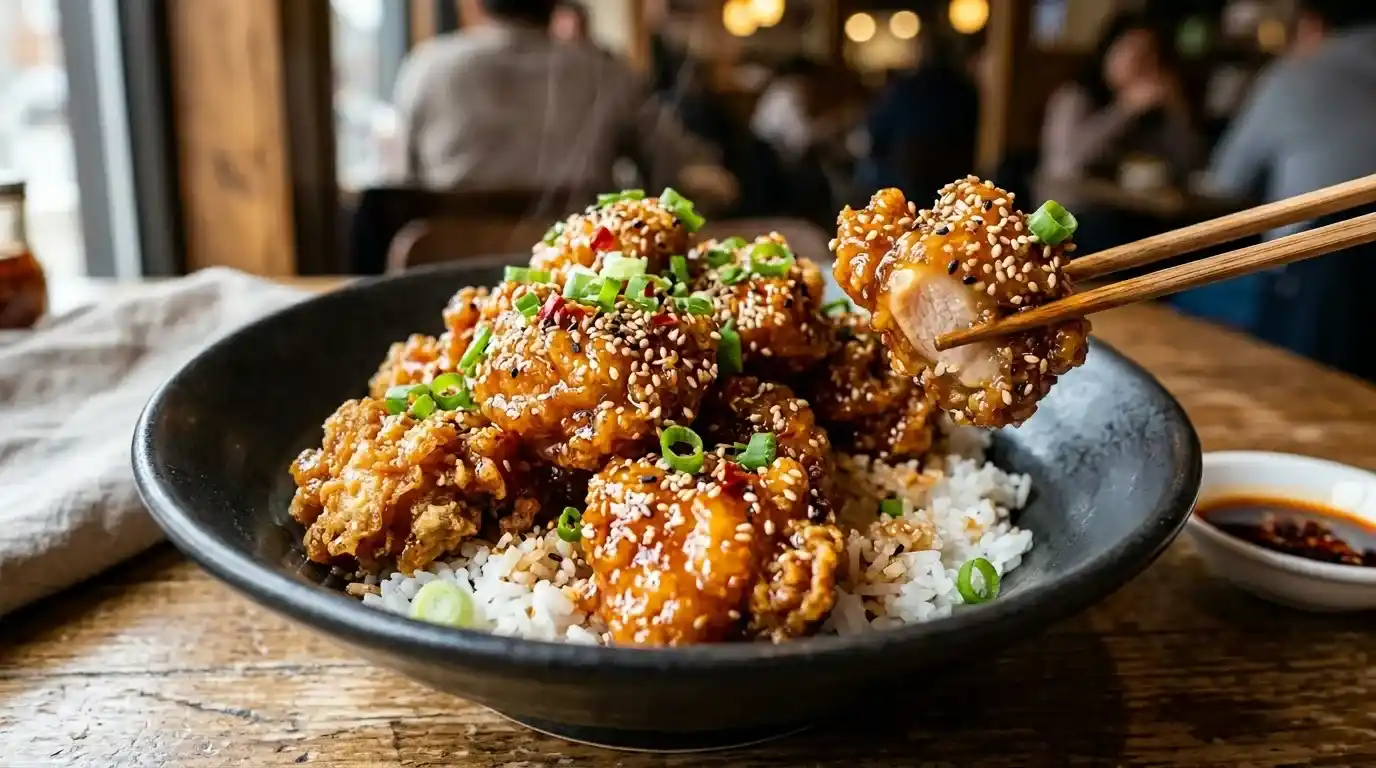
Sesame Chicken Recipe – Crispy Chicken in 30 Minutes
My mother showed me how to make this when I was about twelve, and I did not appreciate it until I spent twenty years trying to recreate her version and kept falling short. Sesame Chicken Recipe was the one she made effortlessly — crisp batter, glossy sauce, sesame seeds that actually stayed on. What I got for two decades was pale batter, thin sauce, and a dish that lost its texture before it reached the table. The problem was the batter method. Once I understood what she was actually doing, everything changed.
Why Sesame Chicken Recipe Works — Here Is What I Do Differently
Sesame Chicken Recipe holds its crust through the sauce because the batter is based on cornstarch rather than flour. Flour creates a thick, absorbent coating that softens the moment it meets any liquid. Cornstarch produces a thinner, harder shell — one that the sauce glazes rather than penetrates. The result is a piece of chicken that stays crisp at the edges even after sitting in the sauce for a few minutes.
The second reason is the sauce reduction. Most versions add everything to the pan and hope. The sauce in this recipe is cooked separately until it reaches a specific consistency — thick enough to coat a spoon — before the chicken ever touches it. This step takes four minutes and is the difference between a glaze and a pool.
Here Is What I Do Differently Before You Start
Use chicken thighs, not breasts. Thighs stay juicy through frying because of their fat content. Breast meat dries at the edges before the centre cooks through when cut into pieces and fried at this temperature. My mother always used thighs. It took me years to stop second-guessing her.
Skip the baking soda in the batter — and I will stand behind this. Almost every recipe includes it to lighten the coating. The result is a batter that puffs and then deflates almost immediately, creating air pockets that fill with oil. Without baking soda, the cornstarch batter stays dense and crisp. Everyone who eats this here asks what makes the coating different. One fewer ingredient is the reason.
Dry the chicken thoroughly. Pat each piece with paper towels until the surface feels completely dry. Wet chicken steams instead of frying, and the batter will slide rather than adhere.
Have everything ready before the oil heats. Once frying starts, the process moves fast. The sauce, the garnishes, the plate — all of it should be within reach.
What You Need
For the Chicken
- 680 g (1½ lb) boneless, skinless chicken thighs, cut into 4 cm (1½ inch) pieces
- 80 g (⅔ cup) cornstarch
- ½ teaspoon fine sea salt
- ¼ teaspoon white pepper
- 1 large egg white, lightly beaten
- Neutral oil for frying (about 750 ml / 3 cups vegetable or sunflower)
For the Sesame Sauce
- 3 tablespoons soy sauce
- 2 tablespoons rice vinegar
- 2 tablespoons runny honey
- 1 tablespoon toasted sesame oil
- 1 tablespoon light brown sugar
- 2 garlic cloves, finely grated
- 1 teaspoon fresh ginger, finely grated
- 1 teaspoon cornstarch
- 60 ml (¼ cup) water
For Finishing
- 2 tablespoons toasted sesame seeds
- 3 spring onions, thinly sliced
Optional: steamed white rice, steamed broccoli, extra chilli flakes
How to Make Sesame Chicken Recipe — Here Is What I Do Differently at Every Step
Phase 1: Coat and Fry the Chicken
Sesame Chicken Recipe starts with the coating — get this right and the rest is straightforward.
- Pat the chicken pieces completely dry with paper towels. Any surface moisture will cause the batter to slip and the oil to spatter.
- Whisk together the cornstarch, salt, and white pepper in a large bowl. Add the egg white and stir until a thick, smooth paste forms — it should coat a spoon and hold its shape without dripping.
- Add the chicken pieces to the bowl and toss until every surface is evenly coated. The coating should look opaque and slightly sticky — not wet and pooling.
- Pour the oil into a deep, heavy-based pot or wok to a depth of about 6 cm (2½ inches). Heat over medium-high until it reaches 180°C / 350°F. A small piece of batter dropped in should sizzle immediately and float to the surface.
- Fry the chicken in two batches — do not crowd the pot. Each piece should have space around it. Cook for 4–5 minutes per batch, turning once, until the coating is pale gold and the chicken reaches 74°C / 165°F internally. The coating will not look deeply golden at this stage; that is correct.
- Drain on a wire rack set over paper towels. Do not use just paper towels — the rack keeps the base of the coating crisper than towels alone.
Phase 2: Make the Sauce
- Whisk together all the sauce ingredients — soy sauce, rice vinegar, honey, sesame oil, brown sugar, garlic, ginger, cornstarch, and water — in a small bowl until smooth and the cornstarch has fully dissolved.
- Pour the sauce into a medium skillet or wok over medium heat. Stir constantly as it comes to a simmer — it will thicken quickly once it reaches temperature.
- Cook for 3–4 minutes, stirring, until the sauce is thick enough to coat the back of a spoon and leaves a clear line when a finger is drawn through it. The colour should deepen from pale to a glossy amber. Remove from the heat.
Phase 3: Combine and Finish
Sesame Chicken Recipe comes together in under 2 minutes in this final phase — timing matters.
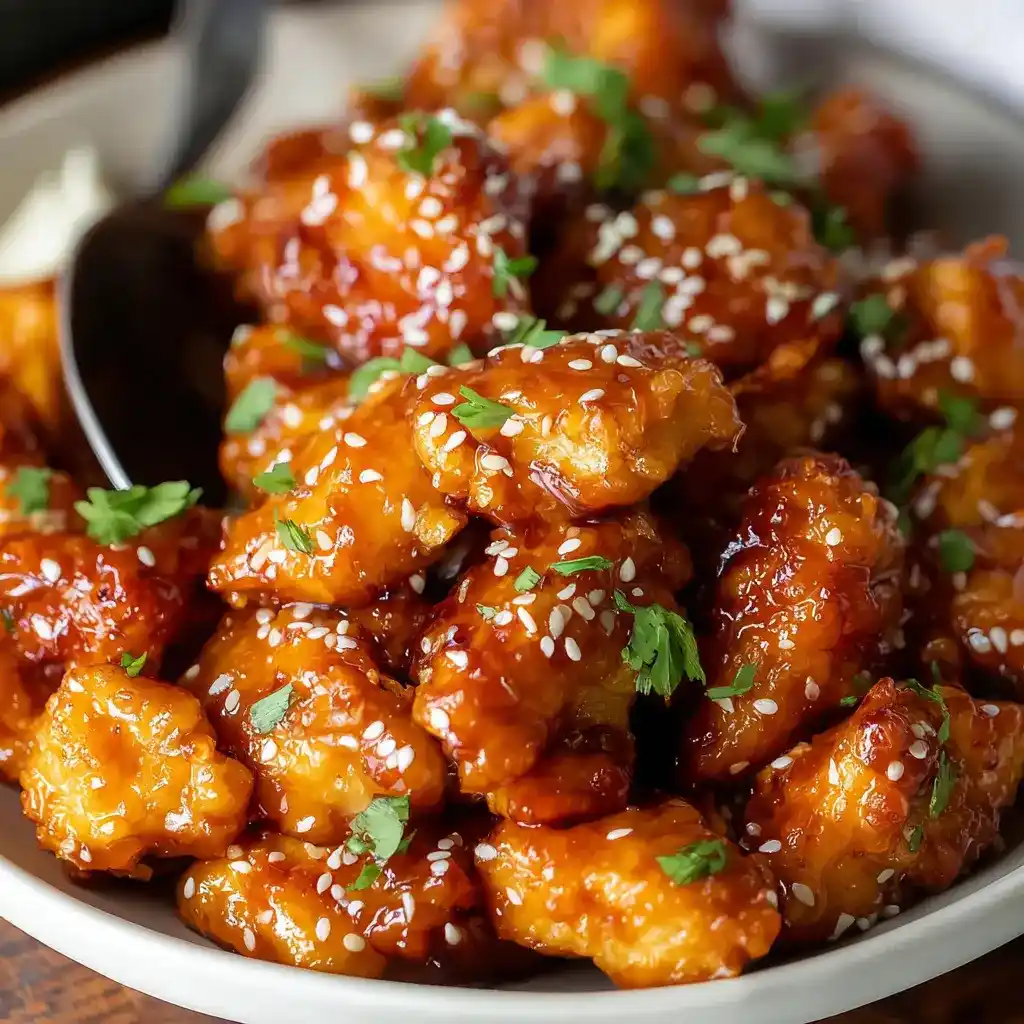
- Add all the fried chicken pieces to the sauce in the skillet. Toss to coat every piece evenly. Work quickly — the sauce will set on the chicken within 60–90 seconds, and coating it too late means uneven coverage.
- Transfer immediately to a serving plate. Scatter the toasted sesame seeds and sliced spring onions over the top. The sesame seeds should go on after plating so they stay on the surface rather than sinking into the sauce.
- Serve within 5 minutes. The coating stays crisp for the first few minutes and softens gradually after that — this dish does not hold.
Here Is What I Do Differently — Make-Ahead Notes
The sauce can be made up to 3 days ahead and refrigerated in a sealed jar. Reheat it gently in a skillet over low heat, stirring, before adding the fried chicken. The chicken batter paste can be made and the chicken coated up to 2 hours ahead and kept refrigerated, covered — do not stack the pieces. Fry them cold from the fridge; the coating holds its shape better. Do not fry the chicken ahead — reheated fried chicken loses its texture and the batter becomes tough.
Here Is What to Serve With It
Steamed white rice absorbs the extra sauce in the bowl and provides the plain base that balances the sweet-salty glaze. Steamed broccoli is the most natural vegetable pairing — its mild bitterness holds up against the sweetness of the sauce. An Asian cucumber salad provides a cool, sharp contrast that cuts through the richness of the fried coating. Plain noodles dressed with a small amount of sesame oil work as an alternative to rice and add a different texture to the plate. Spring onion pancakes are the pairing I reach for when I want the meal to feel complete.
Here Is What to Do When Things Go Wrong
PROBLEM: Your Sesame Chicken Recipe batter slid off the chicken during frying and the pieces came out bare. CAUSE: The chicken was not dry enough when coated, or the batter was too thin. FIX: Pat the chicken aggressively dry — more thoroughly than seems necessary. The egg white batter should be thick enough to hold a peak when lifted on a spoon. If it flows freely, add another tablespoon of cornstarch.
PROBLEM: The coating is greasy and soft rather than crisp. CAUSE: The oil temperature dropped when the chicken went in, causing the batter to absorb oil rather than fry. FIX: Use a thermometer and maintain 180°C / 350°F throughout. Fry in small batches — adding too much cold chicken at once drops the temperature below the frying threshold. Let the oil return to temperature between batches.
PROBLEM: The sauce is thin and watery and runs off the chicken instead of glazing it. CAUSE: The sauce was not reduced far enough before the chicken was added. FIX: The sauce is ready when it coats the back of a spoon and leaves a clear line when a finger draws through it. Return the sauced chicken to the skillet over medium heat for 60 seconds, tossing constantly — the residual heat reduces the sauce further.
PROBLEM: The sesame seeds are falling off and none are adhering to the chicken. CAUSE: The seeds were added to the sauce rather than scattered on after plating. FIX: Always scatter sesame seeds over the plated dish, not into the sauce. Seeds that cook in the sauce sink and clump; seeds scattered over the plated dish sit on the surface and stay visible.

Estimated Nutrition Per Serving (serves 4)
| Nutrient | Per Serving |
|---|---|
| Calories | ~420 kcal |
| Total Fat | 18 g |
| Saturated Fat | 3 g |
| Carbohydrates | 32 g |
| Fibre | 1 g |
| Sugar | 14 g |
| Protein | 32 g |
| Sodium | 810 mg |
Figures are estimates. Values vary with exact ingredients and portion sizes.
Questions I Get Asked About This One
Can I bake the chicken instead of frying it?
Baking produces a different dish — softer coating, less distinct texture, and a paler colour. If you want to avoid frying, toss the coated pieces in a small amount of oil, spread them on a wire rack set over a baking sheet, and bake at 220°C / 425°F for 20–22 minutes, turning halfway. The coating will crisp at the edges but will not have the same crunch as the fried version. The sauce step is identical.
Does this work with chicken breasts?
Breasts work but produce a drier result at this cooking temperature. If you use breasts, cut them slightly smaller — about 3 cm (1¼ inch) — and reduce the frying time to 3–4 minutes. Check that they reach 74°C / 165°F internally. The coating behaves identically; it is the interior texture of the chicken that changes.
Can I make Sesame Chicken Recipe ahead for a dinner party?
Sesame Chicken Recipe is best served immediately, but you can partially prepare it ahead. Fry the chicken up to 30 minutes before guests arrive and keep it warm on a wire rack in a 120°C / 250°F oven. Make the sauce ahead and reheat it in the skillet. Combine the chicken and sauce right before serving, scatter the sesame seeds, and bring it straight to the table.
Why does my sauce turn into a solid, sticky mass in the pan?
The cornstarch was over-measured, or the sauce was reduced too far. The sauce should reach a consistency that coats a spoon — not a gel. If it has already set hard, add water a tablespoon at a time off the heat, stirring vigorously, until it loosens to the right consistency. For next time, measure the cornstarch precisely: 1 teaspoon, level.
Closing
My son finished the entire portion before I had set the second plate — and he is not someone who tracks what he is eating or comments on it. Watching him scrape the serving bowl told me that Sesame Chicken Recipe had finally become what my mother’s was. If you tried skipping the egg white and using only cornstarch as a dry dredge, I really want to know whether the coating stayed on through the sauce — tell me below.
Sesame Chicken Crispy Sweet and Savory Perfection
Ingredients
Method
- Place chicken pieces in a bowl and marinate with soy sauce and sesame oil for 15 minutes.
- In another bowl, whisk together eggs and flour until combined.
- Coat marinated chicken pieces in cornstarch, then dip into the egg mixture.
- Heat vegetable oil in a large frying pan over medium-high heat.
- Fry chicken pieces in batches until golden brown and crispy.
- Transfer fried chicken to paper towels to drain excess oil.
- In a separate pan, combine honey, ketchup, soy sauce, garlic, rice vinegar, and brown sugar.
- Cook the sauce over medium heat until slightly bubbling.
- Stir in the cornstarch slurry and cook until the sauce thickens.
- Add crispy chicken to the sauce and toss until evenly coated.
- Garnish with sesame seeds and sliced green onions before serving.
Video
Notes
- Use chicken thighs for extra juicy texture.
- Fry chicken in batches to keep it crispy.
- Serve immediately for the best crunch and flavor.
- Pair with steamed rice or stir-fried vegetables for a complete meal.