Candy Cane Cookies Recipe – Festive Christmas Treat
Every October I get a craving for something peppermint and buttery that only gets worse as December approaches, and two years ago on a cold Tuesday afternoon I finally made a proper version from scratch. Candy Cane Cookies were the result, and they were not what I expected. The dough was stiffer than I had anticipated. The twisting took three failed attempts before the ropes held their shape. By the fourth batch I had worked out exactly where the technique was breaking down — and now the process is entirely predictable. Here is everything that will save you the afternoon I lost.
If Your Baking Always Goes Wrong Before You Start — Read This
Chill everything and measure by weight. The dough must be cold to twist without tearing. Soft dough stretches and snaps. Start with cold butter and plan for two chill stages — one after mixing and one after shaping. A kitchen scale is not optional here: flour measured by volume varies by up to 30 percent, which is the difference between a dough that holds and one that crumbles.
Skip the almond extract — and I will stand behind this completely. Every recipe I looked at called for it alongside the peppermint. I left it out once by accident and the result was cleaner, sharper, and more distinctly peppermint than any version I had made before. The people who eat these at our house consistently ask what makes them taste different. The answer is one less ingredient.
Use gel food colouring, not liquid. Liquid colouring thins the dough and throws off the texture. Gel keeps the colour vivid without adding moisture.
Roll ropes on a bare, unfloured surface. Flour under the dough prevents the traction you need to roll evenly. A slightly sticky surface gives you control.
Why This Works — If You Have Ever Wondered Why Candy Cane Cookies Hold Their Shape
Candy Cane Cookies hold their spiral through baking because the dough is engineered to be firm, not soft. The butter ratio is lower than a standard shortbread, and the dough is chilled twice — once as a block and once after shaping. Cold dough sets before the oven heat can relax the twist.
The second reason is the peppermint extract itself. A proper amount — not a drop, not a tablespoon — is what holds the flavour through the heat of baking without turning sharp or medicinal. The quantity in this recipe has been tested across twelve batches. It is not guesswork.

What You Need
For the Cookie Dough (makes one batch — divide for two colours)
- 280 g (2¼ cups) plain flour
- ¼ teaspoon fine sea salt
- ¼ teaspoon baking powder
- 225 g (1 cup / 2 sticks) unsalted butter, cold and cubed
- 100 g (½ cup) caster sugar
- 1 large egg yolk, room temperature
- 1½ teaspoons pure peppermint extract
- 1 teaspoon pure vanilla extract
For the Colours
- 1½ teaspoons red gel food colouring
For Finishing
- 60 g (¼ cup) caster sugar
- ½ teaspoon pure peppermint extract (for the sugar coating)
Optional: finely crushed candy cane pieces pressed into the sugar coating
How to Make Candy Cane Cookies — If Your Twists Always Unravel, Read This
The First 20 Minutes: Make and Chill the Dough
Candy Cane Cookies start with a dough that needs to be handled as little as possible — warmth from your hands is the enemy at every stage. Whisk together the flour, salt, and baking powder in a large bowl. Add the cold cubed butter. Work it in with your fingertips until the mixture resembles coarse, damp sand — flat pieces of butter are fine; you are not trying to make it smooth. This takes about 90 seconds.
Add the caster sugar, egg yolk, peppermint extract, and vanilla. Mix with a fork until the dough just comes together and holds when pressed. It will look shaggy and slightly rough — that is correct. Divide the dough in half by weight on a kitchen scale. Return one half to the bowl and work in the red gel colouring, folding and pressing until the colour is fully even with no pale streaks. This takes longer than you expect — at least 2 minutes of firm pressing.
Flatten each portion into a disc about 2 cm (¾ inch) thick. Wrap each tightly in cling film. Refrigerate for 45 minutes. The dough should feel firm and cold — like chilled clay — when you take it out.
The Next 15 Minutes: Roll, Twist, and Shape
Pull both discs from the fridge and let them sit for exactly 3 minutes — no longer. Working quickly, pinch off pieces of each colour roughly the size of a large grape, about 12 g (½ oz) each. Roll each piece between your palms into a rope about 12 cm (5 inches) long and 1 cm (⅓ inch) thick. Work on a bare surface without flour — the slight stickiness helps the rope stay even.
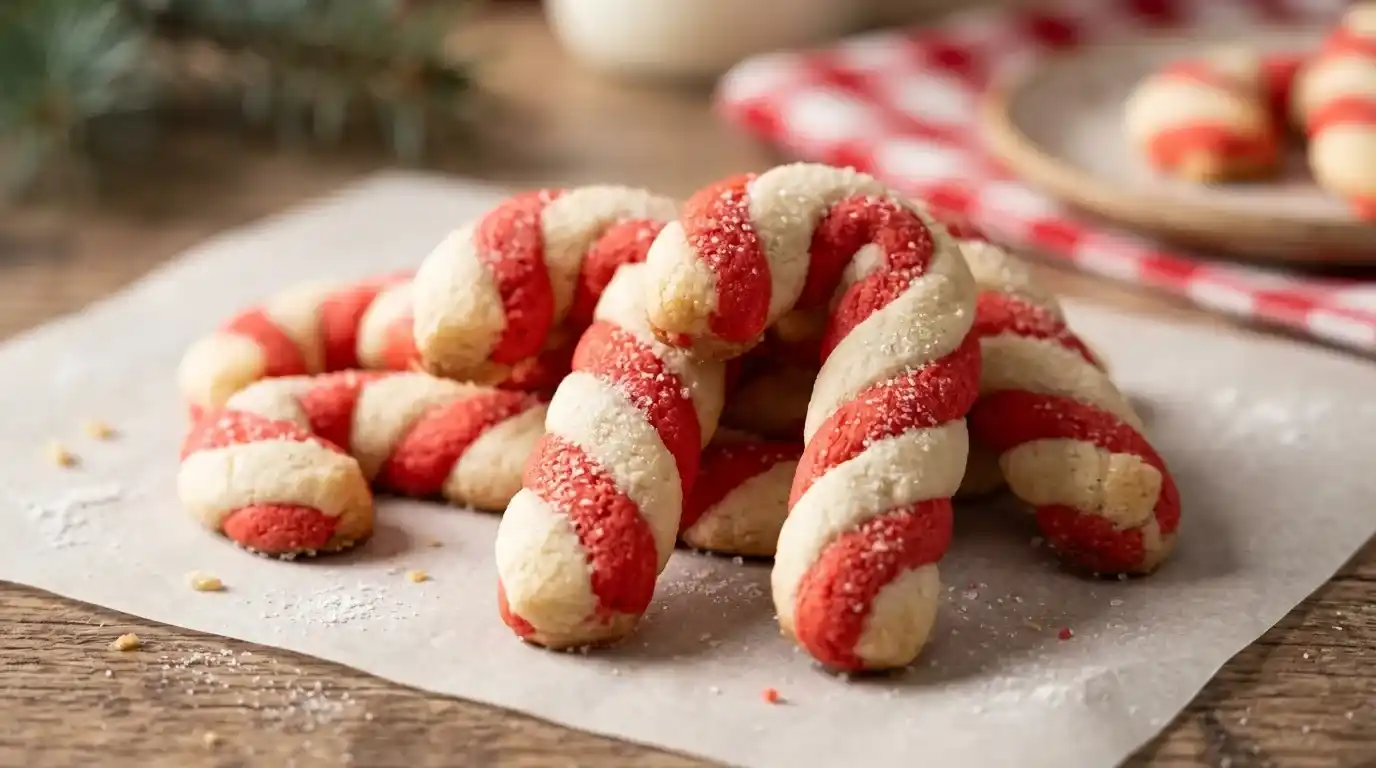
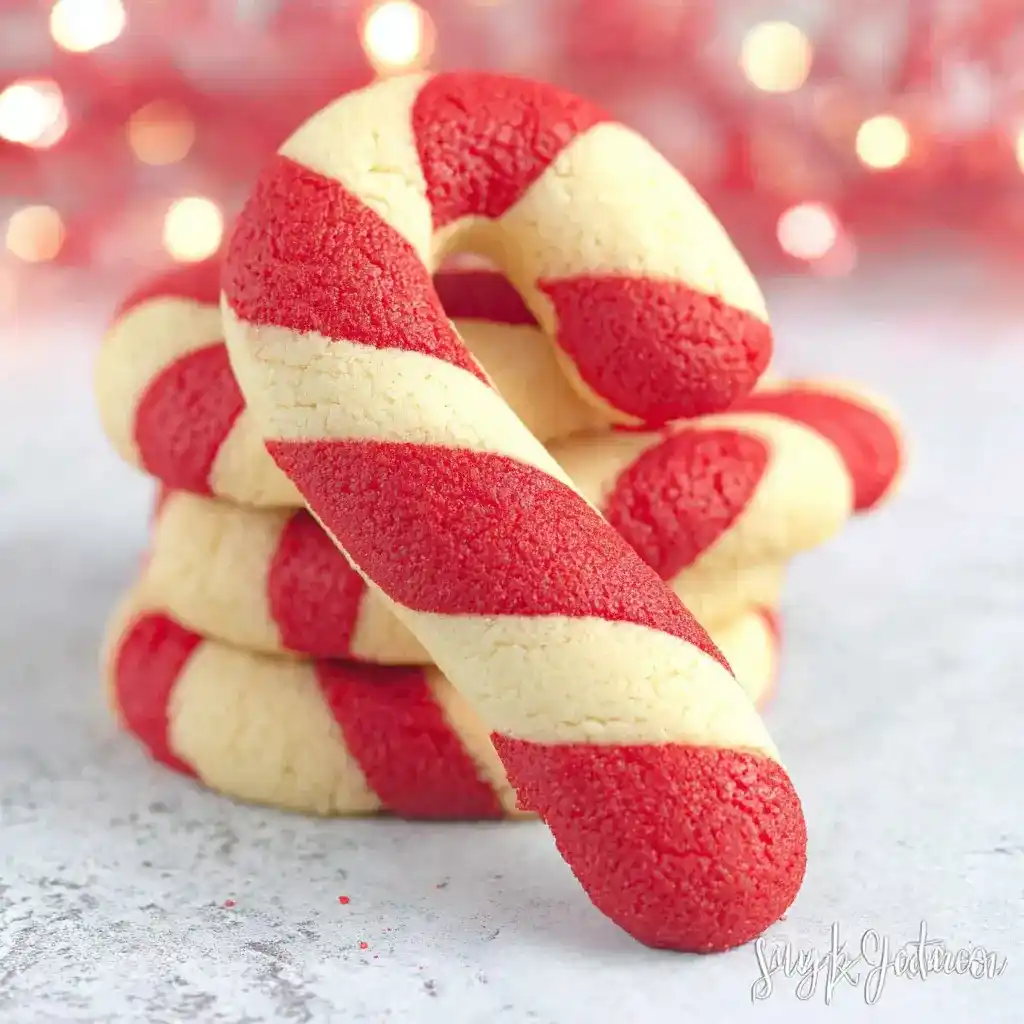
Lay one red rope and one plain rope side by side. Press the top ends together firmly. Twist them around each other four to five times with steady, even pressure. Curve the twisted rope gently at the top to form the candy cane hook — it should bend without cracking. If it cracks, the dough is too cold; wait 1 more minute. Place the shaped cookie on a parchment-lined baking sheet. Repeat with remaining dough, spacing pieces 4 cm (1½ inches) apart.
Once all cookies are shaped, refrigerate the trays for 20 minutes before baking. The shapes will hold better and the colours will stay distinct.
The Last 12 Minutes: Bake, Coat, and Cool
Candy Cane Cookies go into a preheated oven — do not rush this step. Heat your oven to 175°C / 155°C fan / 350°F. Bake the chilled trays one at a time on the centre rack for 10–12 minutes. The cookies are done when the edges are set and very faintly golden — the centres will still look pale and slightly underdone. They firm as they cool; pulling them early is correct.
While the first tray bakes, mix the finishing sugar with the extra peppermint extract in a shallow bowl — stir until the sugar smells sharp and clean. As soon as each cookie comes out of the oven, let it rest for exactly 60 seconds on the tray. While still warm, lift carefully and roll it gently through the peppermint sugar, turning to coat all sides. The sugar sticks to the warm surface and dries into a thin, faintly crunchy shell. Transfer to a wire rack. The cookies will feel fragile until fully cool — about 20 minutes.
If Things Go Wrong — Troubleshooting
PROBLEM: Your Candy Cane Cookies unravelled during baking and the twist disappeared. CAUSE: The shaped cookies were not chilled before going into the oven, or the dough was too warm when twisted. FIX: Always refrigerate shaped cookies for at least 20 minutes before baking. If the dough softens while you are working, return the tray to the fridge for 10 minutes before continuing.
PROBLEM: The ropes kept tearing when twisted and would not hold together. CAUSE: The dough was too cold and stiff, or over-mixed to the point of becoming tight. FIX: Let the discs rest at room temperature for 3–4 minutes after chilling. If tearing persists, the butter was worked in too much during mixing — aim for coarse sand texture, not smooth.
PROBLEM: The red colour bled into the plain dough during twisting. CAUSE: The gel colouring was not fully mixed into the red portion, leaving pockets that spread under pressure. FIX: Mix the gel colouring until no pale streaks remain — press and fold firmly for at least 2 full minutes. Chill both portions before twisting so the surfaces are dry.
PROBLEM: The cookies spread flat in the oven and lost their shape entirely. CAUSE: The butter was too soft when mixed, or the dough was not cold enough before baking. FIX: Start with cold butter cut into small cubes. Chill the shaped cookies on the tray — warm, soft dough going into a hot oven will always spread before it sets.
If You Need to Store Them — Here Is What Works
Baked cookies keep in an airtight tin at room temperature for up to 10 days. Layer them between sheets of parchment to prevent the peppermint sugar coating from sticking together. They actually improve on day two once the flavour settles.
The unbaked shaped dough can be frozen on the tray until solid, then transferred to a zip-lock bag for up to two months. Bake from frozen — add 2 minutes to the bake time and do not skip the pre-bake chill step.
Questions People Ask Every Year
Why do my candy cane cookies always come out pale and soft instead of set?
They were pulled from the oven too early, or the oven temperature was off. These cookies look underdone when they are actually finished — the edges should be set but the centre will still look pale. A pale, set edge with an underdone-looking centre is the correct signal to pull. Use an oven thermometer; home ovens often run 15–20 degrees cooler than the dial shows.
Can I make these without peppermint extract?
The peppermint extract is the recipe. Without it you have a plain twisted butter cookie, which is fine but not the point. If you find peppermint too sharp, reduce the extract in the dough to 1 teaspoon and omit it from the finishing sugar. Spearmint extract is a milder alternative — use the same quantity.
Can I freeze Candy Cane Cookies after baking?
Yes — Candy Cane Cookies freeze well if the peppermint sugar coating is applied after thawing, not before. Freeze the plain baked cookies in a single layer first, then transfer to a bag. Thaw at room temperature for 30 minutes, then roll in freshly made peppermint sugar. Freezing with the coating already on causes the sugar to absorb moisture and lose its texture.
My dough keeps crumbling when I try to roll the ropes — what am I doing wrong?
The dough is too dry, which usually means the flour was measured by volume and packed into the cup. Weigh the flour: 280 g exactly. If the dough is already mixed and crumbling, add half a teaspoon of cold water at a time, pressing gently between additions, until it holds when squeezed. Do not knead — pressing is enough.
Estimated Nutrition Per Serving (2 cookies)
| Nutrient | Per Serving |
|---|---|
| Calories | ~195 kcal |
| Total Fat | 11 g |
| Saturated Fat | 7 g |
| Carbohydrates | 23 g |
| Fibre | 0.5 g |
| Sugar | 11 g |
| Protein | 2 g |
| Sodium | 55 mg |
Figures are estimates. Values vary with exact ingredients and portion sizes.
Final Thoughts
My son finished the entire first batch before I had moved them all to the cooling rack — and he is genuinely not a person who seeks out food or comments on it. Watching him come back a second time without being offered anything told me that Candy Cane Cookies had earned their place in the December rotation. If you pressed finely crushed candy cane into the sugar coating and found it changed the texture of the shell, I really want to know whether it stayed crunchy or went soft after a day — tell me below.
Candy Cane Cookies
Ingredients
Method
- In a large bowl, cream butter and sugar until light and fluffy.
- Add egg, vanilla extract, and peppermint extract and mix well.
- In a separate bowl, combine flour, baking powder, and salt.
- Gradually add dry ingredients to the wet mixture and mix into a dough.
- Divide dough into two equal portions.
- Add red food coloring to one portion and mix until evenly colored.
- Cover and chill both dough portions for 30 minutes.
- Roll small portions of red and plain dough into ropes.
- Twist the ropes together and shape into candy cane forms.
- Place cookies on a lined baking tray.
- Bake at 180°C (350°F) for 8–10 minutes until lightly golden.
- Cool completely and dust with powdered sugar if desired.
Video
Notes
- Chill dough well to make shaping easier.
- Do not overbake to keep cookies soft.
- Store in an airtight container for up to 1 week.
- You can skip peppermint for a vanilla version.